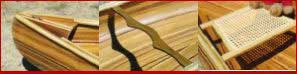
Seats and Gunwales
 Lining up the gunwales and seat frames |
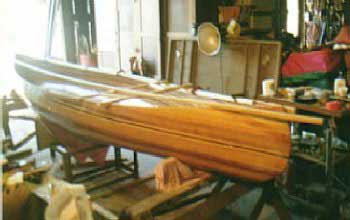
Before fitting the gunwales, seats and decks we will have to cut the "sheer line" of our canoe. This is the curve that runs from the center to the top of the stems. Some canoes have a high rise at the stems and others are fairly flat. Ours will be moderate. The extra cedar strips we installed in step two now come into play in establishing the sheer line. We'll take a thin strip of wood about 8' long, a batten, and clamp one end to the side at the center. Two C-clamps will hold it level with and at the top edge of the first cedar strip we installed. Now we'll pull the other end up to the top of the stem and clamp it in place. From here we can adjust the curve to our liking by adding more clamps along the batten. Stand back and have a look. When the curve looks just right, using a marker pen, we'll draw a line on the canoe along the top edge of the batten. Remove the batten and cut along the line with a jig saw. When this extra piece of glued strips is removed, we'll use it to mark the lines on the other three corners of the canoe. After the sheer line is cut at both ends and both sides we'll sand the sheer line smooth. Stand back and look often to see that the desirable curve is maintained. Now we are ready for the gunwales.
From the 6"x16' poplar board we'll rip four gunwale strips at 1" width. With a round-over bit in the router and the fence and feather boards in place on the router table, we'll route a quater round on two corners of the 1" side of each piece. This will be the outside edge of the outwales and the inside edge of the inwales. Cut two of these pieces just short of the inside length of the sheer line of the canoe. Mark, with a pencil, the center of all four pieces and the exact center of the canoe. Now we'll clamp the inwales to the inside of the sheer line and figure the location of the seats and the scuppers. With a seat frame (see next section) resting on the canoe we'll mark pencil lines to indicate where they will be installed. How far the seats are installed from the ends of the canoe is, to some degree, a matter of preference. I placed the front edge of the front seat 50" back from the bow and the stern seat rear edge 24" forward of the stern stem. With the seats marked we can now mark the scuppers. These are small "gouges" cut out of the outside edge of each inwale using the router with a straight trimming bit. See the yoke picture in the next step. The scuppers make it easier to drain any water from the canoe when it is brought ashore.
 Weaving the cane seats |
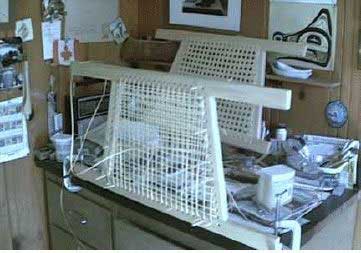
Lets make a couple of cane canoe seats. First we'll need frames. The frames are made from the piece of 1"x6"x8' poplar. Rip it into pieces 1-3/4" wide. For the front seat the fore and aft pieces (the long pieces) will be cut at 34" and the side pieces cut at about 14". Lay two long pieces on a work surface so they are parallel and 15" apart on the outside dimension. Mark the centers. On the upper piece measure out 7-1/2" both ways from center and make a mark. On the lower piece measure out 10-1/2" amd mark. Lay the side pieces under the upper and lower pieces and draw a line to mark the angle. This will give us seats that measure 15"x15"x21" - a little larger than the average 10"x12" canoe seat. The seat frame can be assembled using the mortice and tenion method (which is the strongest) or by cutting the sides at the angle marks and inserting 1/2" dowels through the upper and lower pieces into the side pieces. I used the latter as I do not expect heavy working loads. Use epoxy glue to assemble the frames. Next we'll mark and drill the 1/4" holes for the cane. I found that 18 holes per 15" side and 24 holes on the 21" side worked well. The holes are a little more than 3/4" apart. Round the edges of the holes and sand the seat frames smooth. Apply three coats of marine varnish. At last, we are ready for caning.
I found the plastic caning material very easy to work with. It looks and feels like wood cane right down to its fiber construction. The advantage over wood cane is that if it gets wet it will spring right back to shape. The wood cane will stretch if you are sitting on when it is wet. The cane comes in a 500' hank or a roll and can be purchased from cane chair suppliers or a furniture restoration shop. The detailed steps are long and drawn out so I will not go into the whole procedure. Briefly, the cane is strung vertically and horizontally, then the diagonals are weaved through. Look closely at a cane chair and you'll see the pattern. There are several good books on caning chairs. I used the instructions in Gil Gilpatrick's Building a Strip Canoe. I think they turned out just fine.
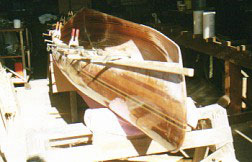 Fitting the gunwales to the hull |